Device magnifier
The other activity on this station. A lens held on one of our phone cameras with Blu Tack. A leaf becomes a landscape, and the shape comes from there.
Shapes and patterns from nature, folded into 3D paper buildings.
Flat paper folded, cut and curled into small 3D buildings. Seven techniques turn a flat strip into a form that stands up.
Buildings go on a shared base, so the city at 17:30 is not the city at 10:00.
Biomimicry. Nature has already solved the structural problem and a designer borrows it. A child finds a shape in nature and builds with it.
Space. Here the city is a lunar base.
Geometry a child can pick up and look at:
The printed patterns are there when there is no real nature.
The other activity on this station. A lens held on one of our phone cameras with Blu Tack. A leaf becomes a landscape, and the shape comes from there.
Look closely. What shapes can you find?
Is it any of these?
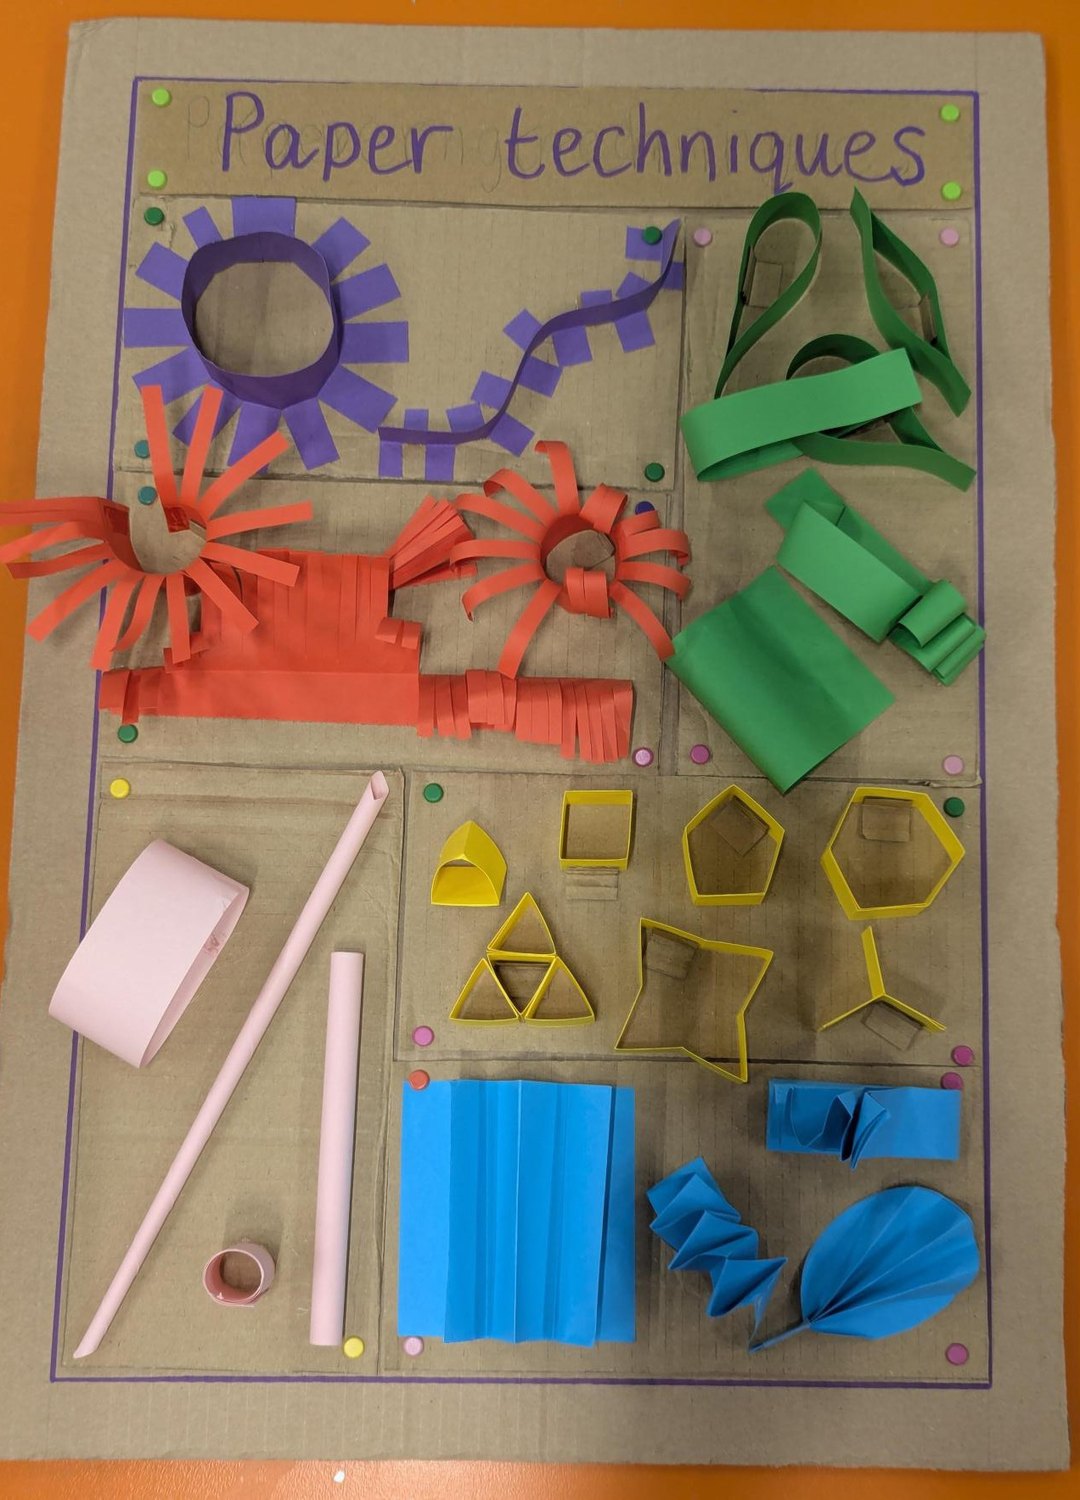
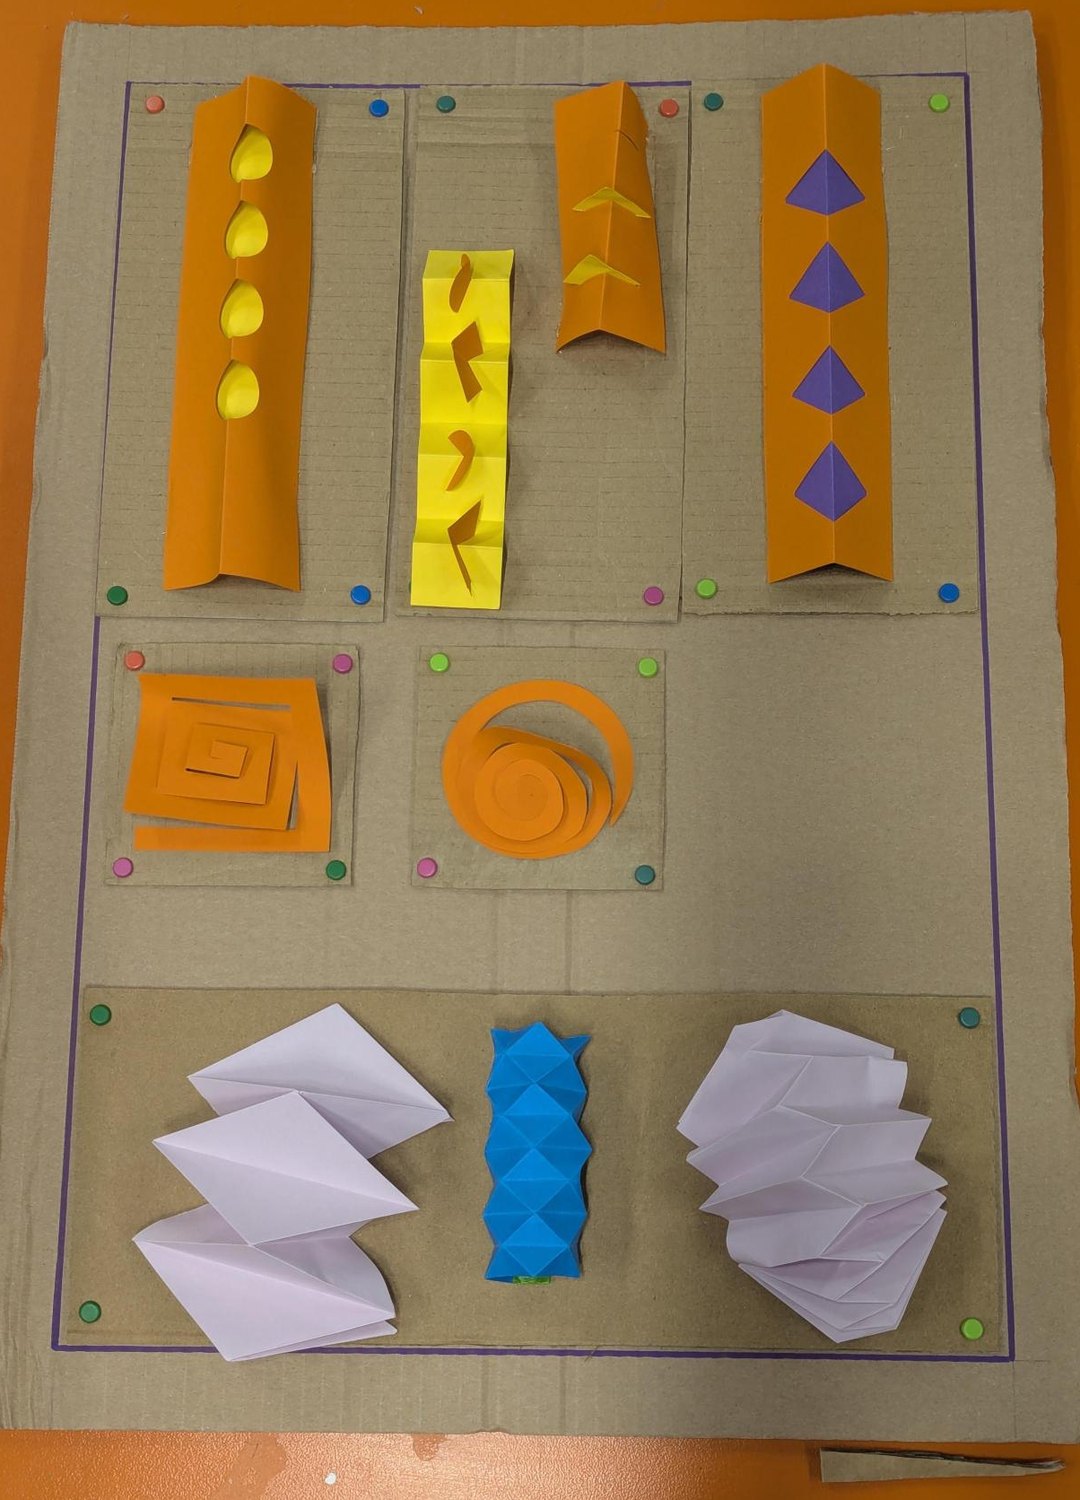
Two example boards, built and pinned up. Check both before the doors open and rebuild only what is damaged. Click a photograph to enlarge it.
On the table, beside the board.
A4
Finished buildings on the table, made in the seven techniques, for a child to pick up and turn over.
Try them before building anything.
Fold a strip. Three folds a triangle, four a square, five a pentagon. Glue the tab inside.
Snip slits along the bottom and glue them flat to a base. Flat becomes upright.
Lots of small snips two-thirds down a strip. Curl them round a pencil for grass or hair.
Fold a strip back and forth like a fan. Stretched out it becomes stairs, a bridge, a flower.
Wrap a strip tightly round a pencil, release it, fold and glue the end. Towers, domes, spiral stairs.
Make a shape from a strip, a circle, a square or a heart, then roll a second strip tightly and slot it inside.
Cut round and round inside a shape towards the middle, then pull the middle up and stick each end.
What is your building for? Who is it on the moon for?
Leave it on the base and it becomes part of our city. Or take it home. It is yours either way.
Egg cartons for beehive walls. Half a plastic bottle for a dome. Bubble wrap round a tube for a textured wall.
A building that falls down needs a bigger base or thicker tape. Say it before it happens.
A pencil, and glue or tape. Fringe, curls and spirals all wrap paper round a pencil.
Offcuts cleared, scissors back in the pot, the surface clear enough for the next child.
The lunar base is not cleared. It is the one thing on this table that accumulates.
| Children | Scissors, throughout. Pencils, glue and tape. |
|---|---|
| Adults | Nothing. |
| First aid | Cleaning wipes and plasters. The risk is cuts. |